برچسب: Kodeco

  • Kotlin Multiplatform by Tutorials | Kodeco

    Kotlin Multiplatform by Tutorials | Kodeco


    This book is for mobile developers and managers who want to explore how they can use Kotlin Multiplatform in different use cases to share code across Android, iOS and desktop apps. If you want to reduce development and testing time by writing certain parts of your apps only once, this book will help.

    • Jetpack Compose Android
    • Compose Multiplatform
    • SwiftUI
    • Testing
    • Dependency Injection with Koin
    • Persistence using SQLDelight
    • Serialization
    • Ktor
    • Concurrency using coroutines

    The best book to teach you how to share code across platforms using Kotlin Multiplatform. You’ll gain the foundation of creating user interfaces using native UI toolkits and then writing common code for serialization, networking and persistence. You’ll also learn how dependency injection, testing and different architectures fit in with…


    more

    This section tells you a few things you need to know before you get started, such as what you’ll need for hardware and software, where to find the project files for this book, and more.

    One of the core benefits of Kotlin Multiplatform is that you can share code across native apps. You can continue to develop the UI layer using native UI toolkits like Jetpack Compose for Android and SwiftUI for iOS.

    In this section, you’ll learn how to add a new Gradle module to write your business logic only once. You’ll also learn how to create the native UI for Android, iOS and desktop apps, all while sharing the common module.

    Kotlin Multiplatform (KMP) is one of the latest technologies to help you share code across platforms. This chapter introduces you to KMP, how you can use it across app layers and how to set up your first KMP project.

    Having reliable build tools and consistent dependency versions is crucial to getting started on a multiplatform project. This chapter will cover how you can use Gradle and its buildSrc module to provide dependencies to all modules. You’ll also learn how to share business logic across target platforms using a multiplatform time zone library.

    Jetpack Compose is a new declarative library aimed at simplifying UI development on Android. This chapter will walk you through creating multiple screens for your app using Jetpack Compose.

    SwiftUI is the modern way to program UI for iOS applications. In this chapter, you’ll learn how to develop the UI for iOS using the SwiftUI framework.

    It’s now possible to share the same UI code across desktop and Android applications. In this chapter, you’ll learn how to develop the UI for desktop using the new Compose Multiplatform declarative library.

    To effectively share code across apps, there are multiple things to keep in mind: access to platform-specific APIs, support for existing software engineering practices and persistence.

    In this section, you’ll learn how to use Kotlin features to access platform-specific APIs in your shared module and how Kotlin Multiplatform fits in with your current architecture. You’ll also learn about dependency injection and how you can use it to test features present in your shared modules. Finally, you’ll learn how to use a common codebase to handle persistence on different platforms.

    When working with KMP, you’ll often need to access platform-specific APIs. In this chapter, you’ll take a deeper dive into the expect/actual pattern and how you can use them to access platform-specific APIs.

    Software architecture is one of the most crucial aspects that affect quality and maintainability over time. In this chapter, you’ll get an overview of different architectures and how you can use one of them in your KMP application.

    Writing tests is an important part of writing code confidently. This chapter will provide an overview of adding unit tests and UI tests to an app created using KMP.

    Dependency Injection is a technique that leads to maintainable and testable code. This chapter will provide an overview of integrating the Koin dependency injection library into a multiplatform project.

    Most modern applications need to persist data across sessions. This chapter will provide an overview of data persistence in KMP. It discusses key-value saving as well as using an SQL database.

    Networking is crucial to most modern apps, and it usually involves implementing similar logic using different frameworks and languages. Under the hood, it also involves concepts like serialization and concurrency. Fortunately, Kotlin Multiplatform has dedicated libraries for each of these.

    In this section, you’ll learn how to use serialization to decode JSON data to Kotlin objects. You’ll then learn how to use a common networking library that leverages this common serialization to fetch data from the internet. To make the networking performant, you’ll also learn about concurrency in Kotlin using coroutines and the considerations for different platforms. Finally, you’ll learn how to extract an existing feature to a Kotlin Multiplatform library and also different ways of publishing this library.

    When transmitting data over a network, you need to serialize and deserialize it. In this chapter, you’ll learn how to use serialization in a Kotlin Multiplatform project.

    Networking is one of the core features of any modern app. In this chapter, you’ll lean how to use networking in a Kotlin Multiplatform project.

    In this chapter, you’ll learn how to deal with concurrency in your Kotlin Multiplatform projects.

    In this chapter, you’ll learn how you can migrate an existing feature to KMP. You also learn how to publish a shared library and make it available for Android, iOS and desktop.

    In this chapter, you’ll learn about several functionalities of Kotlin and their comparison with Swift.

    Xcode doesn’t support debugging Kotlin Native code out of the box. In this chapter, you’ll learn how you can debug your shared code module from Xcode.

    In this chapter, you’ll learn how you can share your Compose UI between Android, desktop, and iOS apps.


    Source link

  • Object-Oriented Programming in Kotlin | Kodeco

    Object-Oriented Programming in Kotlin | Kodeco


    Learn iOS, Swift, Android, Kotlin, Flutter and Dart development and unlock our massive
    catalogue of 50+ books and 4,000+ videos.

    Learn more

    © 2025 Kodeco Inc


    Source link

  • Beginning iOS & Swift | Kodeco

    Beginning iOS & Swift | Kodeco


    We understand that circumstances can change, and if you need to withdraw from the bootcamp, your options will vary depending on your billing cycle:

    – If you enrolled with a monthly plan, you can cancel your future billing with your membership and you will not be renewed on your next billing date OR you can pause your membership for up to three months, then you can pick up your studies again at that time.

    – If you enrolled with a one-time payment, you will be eligible for a full refund within the first 14 days of your enrollment into the bootcamp.

    *Please note: if you’ve accessed a significant portion of program materials, this might affect your eligibility for a full refund.

    Please email support@kodeco.com for further assistance on the withdrawal process.


    Source link

  • Getting Started with SwiftUI | Kodeco

    Getting Started with SwiftUI | Kodeco


    Learn iOS, Swift, Android, Kotlin, Flutter and Dart development and unlock our massive
    catalogue of 50+ books and 4,000+ videos.

    Learn more

    © 2025 Kodeco Inc


    Source link

  • Android User Interface Development | Kodeco

    Android User Interface Development | Kodeco


    Learn iOS, Swift, Android, Kotlin, Flutter and Dart development and unlock our massive
    catalogue of 50+ books and 4,000+ videos.

    Learn more

    © 2025 Kodeco Inc


    Source link

  • Beginning Android & Kotlin | Kodeco

    Beginning Android & Kotlin | Kodeco


    We understand that circumstances can change, and if you need to withdraw from the bootcamp, your options will vary depending on your billing cycle:

    – If you enrolled with a monthly plan, you can cancel your future billing with your membership and you will not be renewed on your next billing date OR you can pause your membership for up to three months, then you can pick up your studies again at that time.

    – If you enrolled with a one-time payment, you will be eligible for a full refund within the first 14 days of your enrollment into the bootcamp.

    *Please note: if you’ve accessed a significant portion of program materials, this might affect your eligibility for a full refund.

    Please email support@kodeco.com for further assistance on the withdrawal process.


    Source link

  • Apple Intelligence | Kodeco

    Apple Intelligence | Kodeco


    We understand that circumstances can change, and if you need to withdraw from the bootcamp, your options will vary depending on your billing cycle:

    – If you enrolled with a monthly plan, you can cancel your future billing with your membership and you will not be renewed on your next billing date OR you can pause your membership for up to three months, then you can pick up your studies again at that time.

    – If you enrolled with a one-time payment, you will be eligible for a full refund within the first 14 days of your enrollment into the bootcamp.

    *Please note: if you’ve accessed a significant portion of program materials, this might affect your eligibility for a full refund.

    Please email support@kodeco.com for further assistance on the withdrawal process.


    Source link

  • Python for AI | Kodeco

    Python for AI | Kodeco


    Learn iOS, Swift, Android, Kotlin, Flutter and Dart development and unlock our massive
    catalogue of 50+ books and 4,000+ videos.

    Learn more

    © 2025 Kodeco Inc


    Source link

  • Kodeco Podcast: How to Read Code – Podcast V2, S3 E1

    Kodeco Podcast: How to Read Code – Podcast V2, S3 E1


    In the first full-length episode of this season, we go back to basics as Senior iOS Dev Mani Ramezan takes us through, step by step, how to come up to speed on a large code base. Whether you’re just starting a new role or beginning to contribute to a new open source project, listen along to learn some useful tips.

    [Subscribe in Apple Podcasts] [Listen in Spotify] [RSS Feed]

    Interested in sponsoring a podcast episode? Check out our Advertise With Kodeco page to find out how!

    Show Notes

    Tune in as Mani, Suz, Jenn and Dru start off talking about how to read a code base and venture off into a bevy of advice for newer devs. Listen all the way to the end to learn what Mani thinks human developers, even brand new ones, can do that AI that cannot.

    Some highlights:

    • Start with a bug, so you have a meaningful goal to guide your exploration.
    • Struggling at step one: setting up the build environment? Improve the process, then document for the next dev.
    • It’s OK to not know all the things. Start by treating each library as a black box. Wait to learn it until you need to.

    Mentioned in This Episode

    Look at Jenn’s Debugging Buddy!

    Have fun with rubber duck debugging!

    Unicorn rubber ducky

    Have fun with rubber duck debugging!

    Contact Mani and the Hosts

    Follow Kodeco

    Where to Go From Here?

    We hope you enjoyed this episode of our podcast. Be sure to subscribe in Apple Podcasts or Spotify to get notified when the next episode comes out.

    Hoping to learn more about a particular aspect of mobile development or life and work as a dev? Please write in and tell us and we’ll do our best to make that happen! Write in too if you yourself would like to be a guest or your have a particular guest request and we’ll see what we can do. Drop a comment here, or email us anytime at podcast@teamkodeco.com.


    Source link

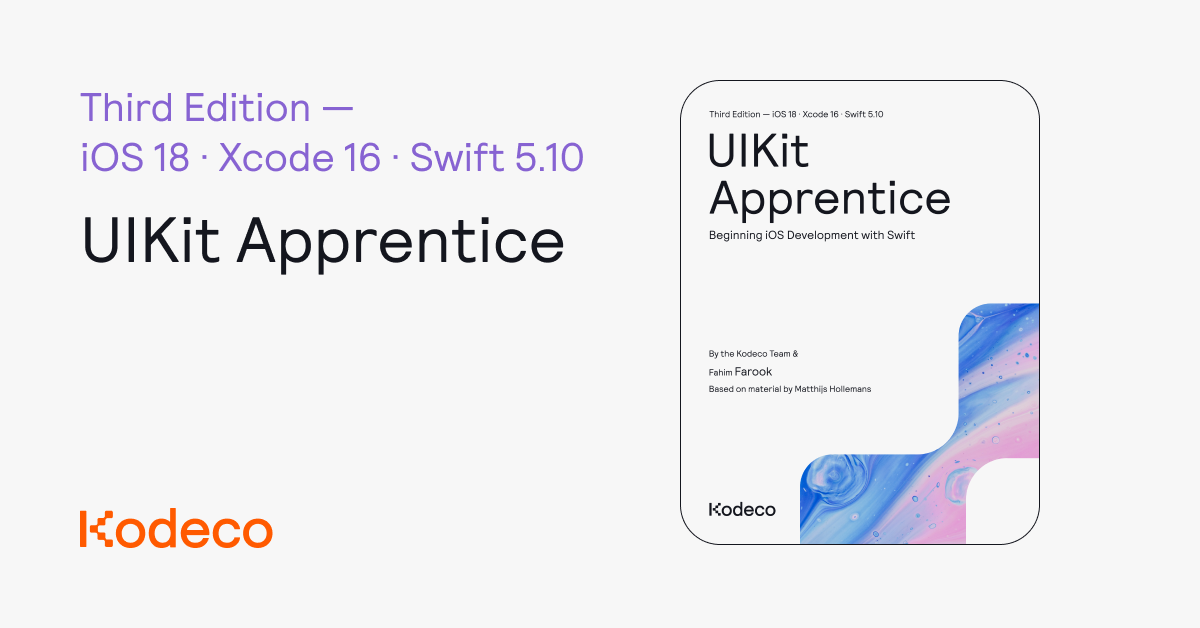
  • UIKit Apprentice | Kodeco

    UIKit Apprentice | Kodeco


    This book is for anyone completely new to Swift and iOS development — or for those that
    just need a little brushing-up!

    • Working with Xcode
    • Coding in Swift
    • Building user interfaces
    • Modelling and persisting data
    • GPS and image data
    • Accessing remote APIs
    • iPad development
    • Publishing to the App Store

    For Complete Beginners!

    If you’re completely new to Swift and iOS development (or need a brush-up), this is the series for you.
    The UIKit Apprentice is a series of epic-length tutorials for beginners where you’ll learn how to build four complete apps from scratch.
    Each new app will be a…


    more

    This section tells you a few things you need to know before you get started, such as what you’ll need for hardware and software, where to find the project files for this book and more.

    This section introduces you to the first of the four apps you’ll build over the course of this book — Bull’s Eye.

    As you progress through building the Bull’s Eye app, the section will teach you how to think like a programmer and how to plan your programming tasks. In addition, you’ll also learn how to use Xcode, Interface Builder, and even the basics of coding for iOS.

    While some of the concepts in this section might seem a bit basic, please do not skip this section if you are new to iOS development – you will learn some fundamentals which act as the building blocks for what you learn later.

    Welcome to The UIKit Apprentice! In this book, you’re about to deep dive into the latest and greatest Swift and iOS best practices. You will build four iOS projects using Swift and UIKit. Good luck!

    In this chapter, you will start building the initial screen for the Bull’s Eye game.

    Congratulations, you have a UIButton on the screen! It’s time to start adding the UISlider which will be fundamental to the game.

    In this chapter you will deal with random numbers, starting a new round of the game, and calculating the points scored.

    It’s time to calculate and display the score and the number of rounds played in this chapter.

    Add some polish to the game so that it actually looks like a game. Also, allow the user to re-start the game so that two people can play the game.

    Let’s spruce up the game UI with some fancy artwork and make your game stand out from the pack. Also, let’s add an About screen with information about the game.

    Phew! You have successfully created Bull’s Eye. In the final chapter of this section you will learn about supporting different device sizes and add some beautiful animations.

    This section builds upon what you learnt in the previous section by introducing you to your second app. Checklists takes you from a single-screen app to a multi-screen app where you learn the concepts of navigation flow, displaying data lists, and the idea of modeling and persisting your data.

    If you want to build any sort of list-based iOS app, this section is a good starting point for learning the basics. Of course, even if you aren’t building a list-based app, this section has some basic concepts such as handling the navigation flow from one screen to another (and back again) that would be very useful to an apprentice iOS developer.

    Add a table view to show a list of to-do items and in the process learn about how to code navigation controllers and table views for iOS.

    In this chapter, we’ll set up a data model to represent our checklist items and then use the data model to display our to-do items.

    All about navigation controllers — how to add them, configure them, and use them. Also learn how add a new screen to your to-do app and how to add the ability to delete to-do items.

    Create the Add Item screen for your app and in the process, learn how to create custom table view cells, get user input, and add polish to data entry screens.

    You’ll learn about delegates and protocols, and how to use them to complete the add items functionality for your Checklists app.

    Now that you can add items, learn how to edit added items. Also, refactor your code to optimize it.

    Checklists works great but we can’t persist our data — our to-do items are reset each time the app is re-launched. Let’s learn how to persist our data between app sessions.

    From one list to many – Checklists manages a single list of items at the moment. That’s not very useful. Let’s add the ability to have multiple lists of items.

    Let’s improve our data model so that we can have different to-do items for each checklist. We’ll also implement a new saving strategy in the process.

    Learn how to save application settings and other useful information between app sessions. Also, how to guard against possible crashes and to improve the first-run experience of the app so that your app looks more polished and user-friendly.

    With the basic functionality for your Checklists app done, it’s time to add some polish and functionality that makes your app stand out from the herd.

    Learn how to add local notifications to Checklists so that you can be notified when a to-do item is due and how to manage notifications through the lifecycle of a to-do item.

    With this third section and the MyLocations app, you get into Swift programming in earnest.

    Sure, you’ve already coded apps in the previous two sections, but this section starts off with a good review of all the Swift coding principles you’ve learned so far and adds to it by introducing some new concepts too.

    In addition to that, you learn about using GPS coordinates, displaying data on maps, and using the iOS image picker to take photos using your camera or to pick existing images from your photo album. There’s a lot of valuable general information on Swift development as well as specific information about building location-aware apps.

    This section also introduces you to building apps for Dark mode – a subject that you’ll do a deep-dive into in the next section.

    You have made great progress! You’ve learnt the basics of Swift programming and created two applications from scratch. Now let’s add some more Swift theory to strengthen the foundations we’ve built while creting those two apps.

    This is the first chapter in this section which teaches you how to create a “location album” app. Take the first steps for creating this new app by learning how to use the Core Location framework to get your location and to display it.

    You were able to access location data and display it in the last chapter. In this chapter, you will improve upon that code by handling GPS errors and improving the GPS accuracy. You’ll also set up the app to handle different screen sizes.

    Time for some more theory! You’ll learn all about objects, classes, inheritance, and a few other object oriented principles from Swift that you need to be familiar with.

    Time to get back to coding again. You’ll learn how to build the Tag Location screen and how to set up another data entry screen for an iOS app.

    The MyLocations app functionality is slowly taking shape now. So it’s time to polish things up a bit by improving the user experience and adding some UI flourishes.

    Learn all about how to save your locations on the device using Core Data, the object persistence framework for iOS.

    Let’s show the data that you’re now able to save via Core Data as a list of locations. Learn about TableView sections, NSFetchedResults and deleting tagged locations.

    Let’s get visual! Show your tagged location on a map view using MapKit so that you can see where in the world each location is.

    Learn how to use the built-in image picker in iOS to add images from either the camera or the photo album to your tagged locations.

    It’s time to give MyLocations a complete visual makeover! You’ll change the styling for the app, add buttons for action items, add sounds, icons, and launch images.

    The final section of the book covers building an app which supports both Light and Dark appearances from scratch via the StoreSearch app. StoreSearch shows you how to have separate custom assets and colors for each type of iOS appearance.

    But that’s not all! The app also shows you how to do custom screens both for specific orientations (landscape vs. portrait) as well as for specific platforms (iPhone vs. iPad). This section covers networking, working with remote API endpoints to fetch data needed by your app, and how to parse the fetched data, how to work with Stack Views, and how to add iPad support to your app.

    If that wasn’t enough, this section also takes you through the full application life cycle – from developing the code, testing it, and all the way to submitting to Apple. So don’t skip this section thinking that you know all about iOS development after the last few sections!

    Most iOS job listings say that you need to have worked with a REST API. Well, this chapter starts you on a new app which will teach you all about how to fetch data from a remote server and get you on the path to REST API mastery.

    Learn how to display your data in a table view using custom table cells. Also change the appearnace of the app and do a bit of debugging.

    Learn the ins and outs of making network requests to remote servers. Then, when you get a response to your request, learn how to parse the JSON response.

    Learn why synchronous networking is bad and how to make things better by switching to asynchronous networking.

    Learn about the powerful networking features provided by URLSession to make network requests that can be cancelled and how to download the image assets for your search results.

    Learn how to add a detail pop-up to show more information about selected search results.

    The detail pop-up works well but it can do with some more spit and polish to make it really shine. Learn all about adding dynamic type support, gradient backgrounds and more animations.

    You’ve only dealt with a single orientation up to now. But your apps need to support both portrait and landscape orientations. Learn how to add landscape support to StoreSearch and by adding a custom interface.

    You’ve made great progress with StoreSearch, but now it’s time to refactor the code to smooth out a few of the rough edges. Knowing how to improve your code by refactoring it is an important skill to learn.

    StoreSearch works great when the display language is English. But what if you wanted to support other languages? Learn all about internationalization and how to update your app to suppport multiple languages.

    Learn how to optimize StoreSearch for iPad and to add iPad specific UI features such as split view conrollers and menu popovers.

    After all that work, your app is finally ready. You just have one more gauntlet to run – the App Store submission process. Learn about the Apple Developer program, beta testing via TestFlight and how to submit your app for Apple approval.


    Source link